

10×30 tent instructions
Learn how to set up your 10x30 tent quickly with our easy-to-follow guide. Get camping faster with expert tips!
Discover how to efficiently set up and utilize a 10×30 tent with our comprehensive guide. Perfect for events, this spacious, durable, and weather-resistant tent offers versatility and ease of assembly. Follow step-by-step instructions for a seamless setup experience.
Overview of the 10×30 Tent
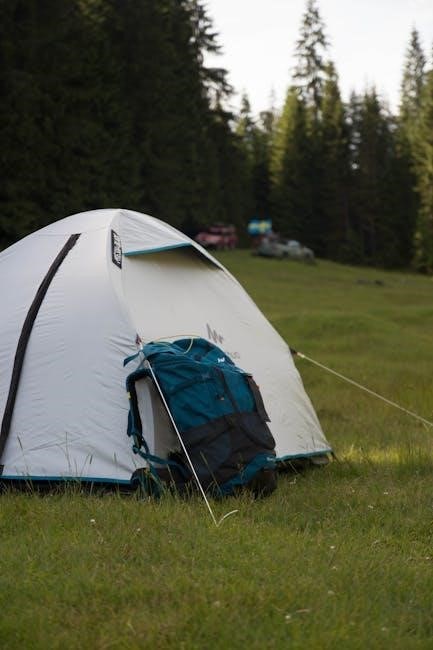
A 10×30 tent is a versatile and spacious structure ideal for hosting events, providing 300 square feet of covered space. Its durable design ensures stability in various weather conditions, making it perfect for outdoor gatherings like weddings, parties, or corporate events. The tent’s frame is typically made of sturdy materials, such as aluminum or steel, and is paired with a waterproof canopy for protection against rain and sunlight. Setup involves attaching the canopy to the frame and securing it with stakes or weights. Optional features like sidewalls and windows can enhance functionality. This tent is also popular for commercial use, such as storage or vending spaces, due to its large capacity and ease of assembly. Its portability and quick setup make it a practical choice for events requiring ample space and reliable shelter.
Key Features and Benefits
The 10×30 tent is designed for durability and ease of use, featuring a sturdy frame, typically made of aluminum or steel, and a waterproof canopy. Its 300-square-foot interior provides ample space for events like weddings, parties, or workshops. Key benefits include quick assembly, portability, and resistance to harsh weather conditions. Optional sidewalls, windows, and weighted anchors enhance functionality and stability. This tent is also ideal for commercial storage or vending, offering a cost-effective solution for businesses. Its lightweight yet robust structure ensures easy transport and setup, making it a practical choice for both short-term events and long-term use. With these features, the 10×30 tent offers a reliable and versatile shelter solution for diverse needs.

Common Uses for a 10×30 Tent

A 10×30 tent is a versatile shelter solution ideal for various events and purposes. It is widely used for outdoor weddings, birthday parties, and corporate events, providing ample space for guests and activities. Additionally, it serves as a practical storage solution for businesses needing to house equipment or supplies. The tent is also popular for vending at markets or fairs, offering a professional and protective setup for sellers. Its durability makes it suitable for community events, such as fairs or church gatherings, and even for sports events as a team or spectator shelter. Furthermore, it can be used for emergency situations, camping trips, or as a temporary garage. With its spacious interior, the 10×30 tent is a reliable choice for both personal and commercial needs, ensuring comfort and functionality in diverse settings.

Pre-Assembly Preparation
Before assembling your 10×30 tent, ensure the site is clear of obstacles and level. Unpack all parts, verify inventory, and gather necessary tools. Prepare a clean, dry workspace for efficient setup.

Unpacking and Inventory of Parts
Start by carefully unpacking the 10×30 tent package. Ensure all components are included, such as the tent frame, canopy, poles, stakes, ropes, and hardware. Check for any damage or missing items. Organize the parts by category to streamline the assembly process. Refer to the provided parts list or manual to verify completeness. Separate the hardware, such as bolts and screws, into labeled containers for easy access. Make sure the instruction manual is readily available for guidance. Properly inventorying and organizing the parts will help prevent delays and ensure a smooth setup experience. If any items are missing or damaged, contact the supplier immediately to resolve the issue before proceeding. This step is crucial for a successful and stress-free assembly of your 10×30 tent.
Choosing the Right Location for Setup
Selecting a suitable location for your 10×30 tent is essential for a safe and successful setup. Ensure the area is flat, even, and free of debris, rocks, or uneven terrain. Avoid low-lying spots to prevent water pooling during rainfall. Choose a location with good drainage to keep the tent dry and stable. Clear the area of branches, leaves, or other obstacles that could interfere with the setup or damage the tent. Check for overhead obstructions like power lines, tree branches, or other structures. Opt for a spot with minimal wind exposure to enhance stability. Ensure the area is large enough to accommodate the tent’s 10×30 footprint comfortably. Finally, verify that the surface is firm and can securely hold stakes or weights for anchoring. Proper site selection will ensure a stable and secure tent setup for your event.
Preparation of Tools and Materials
Before assembling your 10×30 tent, gather all necessary tools and materials to ensure a smooth setup process. Essential tools include a hammer or mallet for driving stakes, screwdrivers for securing connections, and a wrench or Allen key for tightening bolts. Additional items like measuring tape, gloves, and rope tighteners are also recommended. Ensure you have all the hardware provided with the tent, such as stakes, ropes, and frame connectors. If the ground is hard, consider using a stake puller or weight bags for added stability. Keep a ladder or step stool handy for reaching high areas of the tent. Organize all tools and materials in a bucket or container to maintain efficiency. Double-check the inventory list to confirm no parts are missing. Having everything prepared will save time and reduce frustration during assembly.

Assembly Process
Assemble the 10×30 tent by setting up the frame, attaching the canopy, and securing it with stakes and ropes for a stable and weather-tight structure.
Setting Up the Tent Frame
Begin by laying out the frame components, including poles, connectors, and legs. Attach the hip rafters to the crown fittings and secure with top spreaders. Connect corner fittings, side tees, and spreaders. Ensure all parts are tightly fastened. Use the provided hardware to assemble the frame, following the manufacturer’s instructions. Check for stability and make adjustments as needed for a level base. Proper frame assembly is crucial for structural integrity and safety.
Attaching the Canopy to the Frame
Once the frame is assembled, lay the canopy over the top, ensuring it is centered and evenly spread. Attach the canopy to the frame using the provided clips, hooks, or straps. Start by securing the corners firmly, then work your way around the edges. Tighten the ropes or straps to pull the canopy taut, eliminating any sagging or wrinkles. Ensure all sides are evenly tensioned for a smooth appearance. Double-check the attachment points to confirm they are securely fastened. Finally, inspect the canopy for proper fit and make any necessary adjustments to achieve a tight, stable cover.
Securing the Tent with Stakes and Ropes
To ensure the tent remains stable, drive stakes into the ground at each corner and along the sides, securing the frame. Tighten the ropes around the stakes, making sure the tent is firmly anchored. For added stability, use weight bags or sandbags on the frame legs. Check all connections and tighten as needed. Finally, walk around the tent to ensure it is evenly tensioned and secure, making any necessary adjustments for optimal stability and safety.

Troubleshooting Common Issues
Identify and address frame assembly issues, fix canopy attachment problems, and ensure stability. Regular checks and proper anchoring prevent common setup challenges, ensuring a secure and stable tent structure.
Identifying and Resolving Frame Assembly Problems
Frame assembly issues are common but can be resolved with careful attention. Start by ensuring all poles and connectors are included and undamaged. If the frame feels unstable, check for loose joints or misaligned parts. Refer to the manual for correct pole connections. Tighten all bolts and screws firmly, but avoid over-tightening, which may damage the frame. If a pole section is bent or broken, replace it immediately to maintain structural integrity. For recurring problems, consult the troubleshooting section of your tent’s instructions or contact the manufacturer for assistance. Proper frame assembly is crucial for safety and stability, so take the time to verify each connection before moving forward with the setup.
Fixing Canopy Attachment Issues
Canopy attachment problems are often due to improper alignment or insecure fastening. Begin by ensuring the canopy is evenly spread over the frame, aligning grommets with corresponding poles. Use clips or straps to secure the fabric tightly, working from the center outward to avoid wrinkles. If the canopy sags, tighten the ropes or adjust the frame’s height. Over-tightening can cause tears, so handle the fabric gently. For stubborn wrinkles, lightly tug the material or use additional straps for reinforcement. Ensure all corners are firmly attached to prevent flapping in the wind. If issues persist, inspect the canopy for damage or wear, and replace any faulty clips or straps. Proper attachment ensures a smooth, professional appearance and enhances the tent’s stability during events.
Addressing Stability and Structural Concerns
Ensuring the structural integrity of your 10×30 tent is crucial for safety and stability. Begin by verifying that all poles and frames are securely connected and properly angled. Check that stakes are deeply anchored into the ground, with ropes tightly tied to prevent shifting. Weight bags or additional anchors can enhance stability, especially in windy conditions. Inspect the tent’s legs for even distribution of weight to avoid leaning. If the tent sags, tighten the canopy and adjust the frame’s tension. Regularly monitor the structure’s condition, replacing any damaged parts promptly. For added support, consider using reinforced stakes or securing the tent to a firm surface. Properly addressing stability concerns ensures a safe and durable setup, capable of withstanding various environmental factors during events or storage.

Adding Optional Features
Enhance your 10×30 tent with optional features for functionality and style. Install sidewalls for privacy, add windows for natural light, or incorporate lighting and electrical solutions for ambiance and convenience.
Installing Sidewalls and Windows
Installing sidewalls and windows on your 10×30 tent enhances functionality and aesthetics. Begin by attaching sidewalls using the provided straps or Velcro, ensuring a snug fit for weather protection and privacy. For windows, align them with designated openings and secure using zippers or hooks. Ensure all connections are tight to maintain structural integrity. Adjust sidewall placement for optimal airflow and visibility. Proper installation ensures a secure and comfortable environment for your event. Follow manufacturer guidelines for a seamless setup. This step customizes your tent to meet specific needs, whether for shade, ventilation, or visibility.
Adding Weight Bags or Anchors for Stability
Ensuring your 10×30 tent remains stable is crucial, especially in windy conditions. Weight bags or anchors provide additional security by distributing the tent’s weight evenly. Attach weight bags to the tent’s legs using the built-in straps or hooks. Fill the bags with sand or weights for maximum stability. For softer surfaces, use long anchors or stakes to secure the tent frame deeply into the ground. Tighten all ropes and straps after adding weights to maintain tautness. Regularly inspect the setup to ensure all components are firmly in place. This step is essential for preventing the tent from shifting or toppling, ensuring a safe and enjoyable event. Proper use of weight bags or anchors guarantees a sturdy and reliable structure, even in challenging weather conditions.
Incorporating Lighting and Electrical Solutions
Enhance your 10×30 tent setup with proper lighting and electrical solutions to create a welcoming atmosphere. Install LED string lights or fairy lights along the frame for a decorative glow. For task lighting, use portable LED lamps or hanging lights to illuminate key areas. Ensure all electrical equipment is weather-resistant and safely secured. If using generators or power sources, place them outside the tent to avoid fumes and tripping hazards. Run power cords through designated paths or clips to keep them organized and out of the way. Consider solar-powered options for eco-friendly lighting. Always follow safety guidelines to prevent electrical hazards. Proper lighting not only improves visibility but also adds ambiance, making your event more enjoyable and functional for guests.

Safety and Maintenance
Prioritize safety by regularly inspecting tent fabric and frames for wear. Clean the tent with mild detergents and store it dry to prevent mold. Follow maintenance tips to ensure longevity and stability for future use.
Ensuring Structural Integrity and Safety
To ensure the structural integrity and safety of your 10×30 tent, start by inspecting all components for damage or wear. Secure the tent firmly with stakes and ropes, ensuring even tension to prevent sagging or collapse. Always follow the manufacturer’s instructions for weight limits and assembly. Regularly check for loose connections, especially after windy or rainy conditions, and tighten any hardware as needed. Use sandbags or weights for added stability on hard surfaces. Keep the tent fabric clean and dry to avoid mold and mildew. For outdoor events, ensure the setup area is clear of obstacles and overhead hazards. Finally, conduct a final safety check before allowing people inside to ensure a secure and stable environment for your event.
Cleaning and Maintaining the Tent Fabric
Regular cleaning and maintenance of the 10×30 tent fabric are essential to extend its lifespan and ensure optimal performance. Start by brushing off loose dirt and debris from the fabric’s surface. For more thorough cleaning, use a mild detergent mixed with cold water, and gently scrub the fabric with a soft-bristle brush or cloth. Avoid using harsh chemicals, abrasive cleaners, or bleach, as they can damage the material. Rinse thoroughly with clean water to remove all soap residue. Allow the fabric to air dry completely in a shaded, well-ventilated area to prevent sun damage or mildew. Store the tent in a dry, cool place when not in use, ensuring it is completely dry to prevent mold growth. Regular inspections for tears or wear and tear are also crucial for maintaining the tent’s structural integrity.
Storage and Transportation Tips
Proper storage and transportation of your 10×30 tent are crucial to maintain its condition and longevity. Always store the tent in a clean, dry, and cool environment, ensuring it is completely free of moisture to prevent mold or mildew. Fold or roll the tent neatly and place it in a sturdy storage bag to protect it from dust and damage. When transporting, secure the tent firmly to prevent shifting or abrasion. Use a wheeled bag or cart for easier movement, especially for larger tents. Avoid leaving the tent in direct sunlight for extended periods during storage. Regularly inspect the tent for signs of wear and tear before storing or transporting, addressing any issues promptly to ensure it remains in optimal condition for future use.
Final Adjustments and Touches
After assembly, tighten all connections and ensure the canopy is taut. Double-check stability, adjust ropes, and add decorative elements like lights or branding for a polished finish.
Tightening and Adjusting the Canopy
Once the canopy is attached to the frame, ensure all ropes and straps are tightly secured. Start by checking each corner connection to confirm they are snug and evenly tensioned. Use the provided tools, such as a wrench or ratchet, to tighten any loose bolts or screws on the frame. Next, inspect the canopy fabric for any sagging or wrinkles. If necessary, adjust the ropes to pull the fabric taut, ensuring even tension across the entire surface. Pay special attention to the center of the canopy, as it is prone to sagging. Finally, walk around the tent and shake the structure gently to verify stability. Make any final adjustments to the ropes or stakes to ensure the canopy remains secure and properly aligned. This step is crucial for maintaining the tent’s structural integrity and preventing damage from wind or weather conditions.
Final Checks for Stability and Security
After assembling and adjusting the tent, perform a thorough inspection to ensure stability and security. Begin by walking around the perimeter to check that all stakes are deeply embedded into the ground and ropes are tightly secured. Tug gently on each rope to confirm they are taut and properly knotted. Inspect the frame for any signs of bending or stress, ensuring all connections are secure. Check the canopy for tightness and even tension, making sure there are no loose areas that could flap in the wind. Additionally, verify that all sidewalls and windows are securely attached. Finally, assess the overall balance of the tent to ensure it is evenly weighted and stable. These final checks are essential to guarantee the tent remains safe and secure during use, especially in windy or rainy conditions.
Adding Decorative Elements
Add the perfect finishing touches to your 10×30 tent with decorative elements that enhance its appearance and functionality. Begin by installing string lights or fairy lights around the perimeter or along the frame to create a warm, inviting ambiance. Hang banners or signs from the tent’s gables or sidewalls to personalize the space for events like weddings or parties. Use fabric drapes or ribbons to add color and texture, securing them with clips or ties to ensure they stay in place. For a polished look, arrange floral arrangements or centerpieces near the entrance or along the sides. Additionally, consider adding themed decorations such as lanterns, balloons, or seasonal accents to match the event’s style. These decorative elements not only beautify the tent but also create a welcoming atmosphere for guests, making your event truly memorable.