

honeywell th6110d1005 installation manual
Stuck on your Honeywell TH6110D1005 thermostat install? Our easy-to-follow manual skips the jargon & gets you chilling (or heating!) fast. Download now!
Honeywell TH6110D1005 Installation Manual⁚ A Comprehensive Guide
This comprehensive guide provides a detailed walkthrough of the Honeywell TH6110D1005 thermostat installation. It covers everything from initial preparation and wiring to configuration and basic troubleshooting. Following this manual ensures proper setup.
The Honeywell TH6110D1005 FocusPRO thermostat is a user-friendly, programmable device designed for efficient home temperature management. This battery-powered, LCD thermostat allows users to create customized heating and cooling schedules, optimizing comfort and energy savings. Proper installation, as detailed in this manual, is crucial for optimal performance. The thermostat should be installed about 5 feet above the floor in an area with good air circulation for accurate temperature sensing. The TH6110D1005 offers compatibility with various HVAC systems, but settings must be appropriately configured. This guide will help navigate the installation process, ensuring correct wiring and setup for reliable operation. It also covers essential aspects like battery replacement and troubleshooting common issues.
Package Contents and Identification
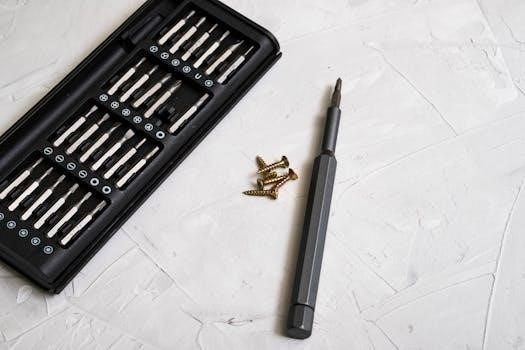
Before beginning the installation, it’s essential to verify the contents of the Honeywell TH6110D1005 thermostat package. Typically, the package includes the FocusPRO TH6110D programmable thermostat itself, which features an LCD screen and control buttons. It also contains the wallplate, which attaches to the wall and provides terminals for wiring connections. Check for an installation guide or instruction manual, offering detailed steps and diagrams. Mounting screws and anchors are usually included to secure the wallplate. Some packages may contain wire labels for easy identification during wiring. Ensure all components are present and undamaged. Missing parts could hinder the installation process. Familiarize yourself with each component before proceeding to the next steps, especially the thermostat model number located on the device.
Preparation for Installation
Prior to installing your Honeywell TH6110D1005, gather necessary tools and materials. Select an optimal location and carefully remove your old thermostat, ensuring power is off for safety.
Tools and Materials Required
Before commencing the installation of your Honeywell TH6110D1005 thermostat, it’s crucial to assemble all necessary tools and materials. This ensures a smooth and efficient process; First, you’ll need a screwdriver set, including both Phillips head and flathead screwdrivers, to handle various screw types. A wire stripper is essential for safely exposing the wires for connection.
Additionally, have a pair of pliers available for manipulating wires if needed. A level will help ensure the thermostat is mounted straight on the wall for aesthetic and functional reasons. You’ll also require wire connectors or electrical tape for securing wire connections.
Consider having a drill with appropriate drill bits if new mounting holes are needed. A pencil will be useful for marking the wall during installation. Lastly, ensure you have fresh AA alkaline batteries if you plan to power the thermostat with batteries. Having these tools on hand will streamline the installation.
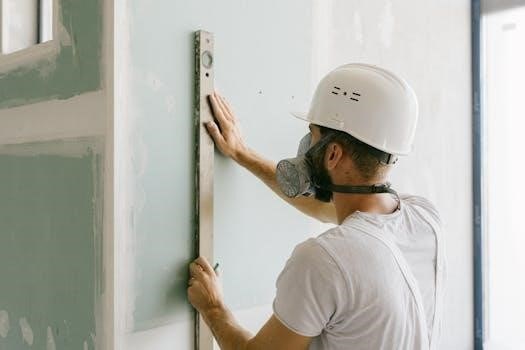
Selecting the Optimal Location
Choosing the right location for your Honeywell TH6110D1005 thermostat is paramount for accurate temperature sensing and efficient operation. Ideally, install the thermostat about 5 feet (1.5 meters) above the floor. This height usually represents the average temperature of the living space. Avoid placing the thermostat in areas with direct sunlight, as this can falsely raise the temperature reading.
Similarly, keep it away from drafts or near heat-generating appliances like lamps, TVs, or kitchen equipment. Ensure the location has good air circulation to provide accurate temperature readings. Do not install the thermostat on an exterior wall, as these walls can be significantly colder or hotter than the interior.
The chosen location should also be easily accessible for adjustments and battery replacement. By carefully considering these factors, you can ensure your thermostat functions correctly and maintains a comfortable environment. Avoid areas behind doors or curtains.
Removing the Old Thermostat
Before installing your new Honeywell TH6110D1005, safely remove the old thermostat. First, turn off the power to the heating and cooling system at the circuit breaker or fuse box. This is crucial for preventing electrical shock. Carefully remove the cover of the old thermostat to expose the wiring and the existing wallplate. Before disconnecting any wires, take a picture or label each wire with its corresponding terminal.
This will serve as a valuable reference during the installation of the new thermostat. Loosen the screws on the terminal blocks and gently detach the wires. If the old thermostat is hardwired, proceed with caution. Once the wires are disconnected, remove the old wallplate from the wall. This may involve unscrewing it from the wall. Store the screws in a safe place for later use, if needed.
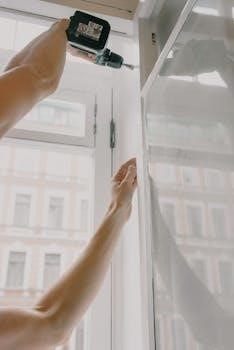
Wiring and Mounting
Proper wiring and secure mounting are crucial for the Honeywell TH6110D1005 thermostat. Follow these steps to ensure correct connections and a stable installation on your wall for optimal performance.
Wallplate Installation
Begin by removing the wallplate from the thermostat unit. Position the wallplate on the wall at the selected location, ensuring it is level for aesthetic and functional reasons. Mark the screw holes for mounting, using a pencil for accurate placement. Drill pilot holes at the marked locations if necessary, especially when installing into drywall or harder surfaces.
Secure the wallplate to the wall using the provided screws. Ensure the wallplate is firmly attached and does not wobble. Push any excess wire back into the wall opening to prevent interference with the thermostat. Keep the wires within the shaded area of the wallplate.
For two-transformer systems, remove the factory-installed jumper, but only if required. The wallplate serves as the foundation for the thermostat, ensuring stable and reliable operation. Correct installation is essential for proper functionality.
Wiring Connections⁚ Step-by-Step Guide
Before starting, ensure the power is turned off to prevent electrical shock. Loosen the screw terminals on the wallplate. Insert the appropriate wires into the corresponding terminal block, matching the wiring designations from the old thermostat or the system documentation. Refer to the wiring diagram for your specific heating and cooling system to ensure accurate connections.
Once the wires are securely inserted, re-tighten the screws on the terminal block. Gently tug on each wire to confirm it is firmly connected. Push any excess wire back into the wall opening, keeping the wires neatly organized within the shaded area of the wallplate.
Double-check all wiring connections before proceeding. Incorrect wiring can damage the thermostat or the HVAC system. If unsure, consult a qualified technician. This step is crucial for safe and effective operation.
Understanding Terminal Designations
Properly understanding the terminal designations is vital for correct wiring. Common terminals include R (power), W (heat), Y (cool), G (fan), and C (common). The R terminal provides 24VAC power, while the W terminal controls the heating system. The Y terminal activates the cooling system, and the G terminal operates the fan.
The C terminal, if present in your system, provides a common wire, which can improve thermostat performance and stability. Carefully identify each wire from your old thermostat and match it to the corresponding terminal on the Honeywell TH6110D1005 wallplate.
For heat-only systems, you will typically only use the R and W terminals. For cool-only systems, you will primarily use the R and Y terminals. Heat/cool systems will utilize R, W, Y, and potentially G and C terminals. Always consult your HVAC system’s documentation if unsure.
Powering Options⁚ Battery or Hardwired
The Honeywell TH6110D1005 offers flexibility with both battery and hardwired power options. Battery power is convenient, especially if you lack a C-wire. Ensure fresh AA alkaline batteries are correctly installed, usually in the battery holder. Check the manual for the correct battery placement.
Hardwiring, utilizing the C-wire, provides a more stable and reliable power source, preventing unexpected battery depletion. If your system has a C-wire, connect it to the C terminal on the thermostat’s wallplate for optimal performance. A common wire can improve thermostat accuracy.
If using battery power, monitor the battery level regularly. Low battery levels can cause inaccurate readings or system malfunctions. Replacing batteries proactively ensures uninterrupted operation. Choose the powering option best suited to your HVAC system and preferences.
Configuration and Setup
Configuring your Honeywell TH6110D1005 involves initial settings, system type selection (heat only, cool only, or heat/cool), and adjusting temperature schedules. Access installer settings for advanced customizations and optimal performance.
Initial Setup⁚ Accessing Installer Settings
The initial setup of your Honeywell TH6110D1005 thermostat involves accessing the installer settings. Begin by pressing and holding the Up arrow and FAN buttons simultaneously until the display changes, indicating that you have entered the setup mode. This allows you to customize various parameters to match your specific heating and cooling system.
Within the installer settings, you can configure options such as system type (heat only, cool only, or heat/cool), temperature display format, and other advanced features. Navigate through the settings using the Up and Down arrow buttons to change values, and press the Next button to move to the subsequent setting. Carefully review each option to ensure it aligns with your system requirements for optimal performance. This step is crucial for tailoring the thermostat to your home’s unique environment.
Setting System Type (Heat Only, Cool Only, Heat/Cool)
Configuring the system type on your Honeywell TH6110D1005 thermostat is a critical step. This ensures it operates correctly with your HVAC setup. Within the installer settings, locate the system type option. Use the Up or Down arrow buttons to select the appropriate mode⁚ “Heat Only” for systems that only provide heating, “Cool Only” for cooling-only systems, or “Heat/Cool” for systems offering both.
Selecting the wrong system type can lead to improper operation and potential damage to your equipment. Double-check your HVAC system’s capabilities before making a selection. For heat pump systems, an additional setting might be required to configure the changeover valve. Refer to the manual for specific instructions on setting the changeover valve to match your heat pump. Accurate system type selection is essential for efficient and reliable performance.
Adjusting Temperature Settings and Schedules
Once the system type is configured, you can customize temperature settings and schedules on your Honeywell TH6110D1005. This allows you to optimize comfort and energy efficiency. The thermostat offers programmable scheduling, enabling different temperature settings for various periods each day.
Access the scheduling menu and set desired temperatures for different times, such as morning, day, evening, and night. Adjust temperature setpoints using the Up and Down arrow buttons. Consider your daily routines and preferences when creating the schedule. For example, you might want a warmer temperature in the morning and a cooler temperature at night.
You can override the schedule temporarily by using the hold feature. Experiment with different settings to find a balance between comfort and energy savings. Regularly reviewing and adjusting the schedule can further optimize performance;
Troubleshooting
This section addresses common issues encountered during or after the Honeywell TH6110D1005 thermostat installation. Find solutions for operational problems, display errors, and connectivity concerns to ensure optimal thermostat performance and user satisfaction.
Common Issues and Solutions
One frequent problem involves temperature settings not changing. Ensure the thermostat is not in a locked mode. Check that fresh AA alkaline batteries are correctly installed if the unit is battery-powered. Verify the system type setting is accurate for your heating or cooling setup.
Another issue can be a blank display. Replace the batteries first. If that doesn’t work, inspect the wiring connections. Ensure all wires are securely fastened to the terminal block. Push any excess wire back into the wall.
If both the heating and cooling equipment are running simultaneously, adjust the changeover valve. Set it to match the installed heat pump within the installer setup menu. This prevents conflicting operations.
Battery Replacement Instructions
When the thermostat displays a low battery warning or the screen is blank, it’s time to replace the batteries. The Honeywell TH6110D1005 thermostat requires two AA alkaline batteries for proper operation.
First, gently remove the thermostat from the wallplate. Locate the battery compartment on the back of the thermostat. Open the battery compartment cover. Remove the old batteries, noting the correct polarity (+ and -).
Insert the new AA alkaline batteries, ensuring they are aligned correctly according to the polarity markings inside the compartment. Close the battery compartment cover securely. Reattach the thermostat to the wallplate, pressing gently until it clicks into place. The thermostat should now power on.