

canon mx410 owners manual
Lost your Canon MX410 owners manual? Find a free, easy-to-use PDF guide here! Print, scan, & troubleshoot like a pro. Get back to creating! ✨
Canon MX410 Owners Manual: A Comprehensive Guide (Updated 01/09/2026)
Today is 01/09/2026 11:22:35. This guide explores how your Canon MX410 can streamline workflow and boost productivity; begin by familiarizing yourself with its features.
Welcome! This comprehensive guide serves as your primary resource for understanding and utilizing all the features of your new Canon MX410 All-in-One Printer. We understand that setting up and learning a new device can sometimes feel daunting, and that’s precisely why we’ve created this detailed manual.
The Canon MX410 is designed to be a versatile and efficient addition to your home or small office, offering seamless printing, scanning, and copying capabilities. This manual will walk you through every step, from initial unboxing and setup to advanced features and troubleshooting.
Before you begin, please take a moment to carefully read through this guide to ensure optimal performance and longevity of your printer. We’ll cover everything from paper handling and ink cartridge replacement to wireless connectivity and resolving common issues. Ciao e benvenuto! Let’s unlock the full potential of your Canon MX410 together.
Unboxing and Initial Setup
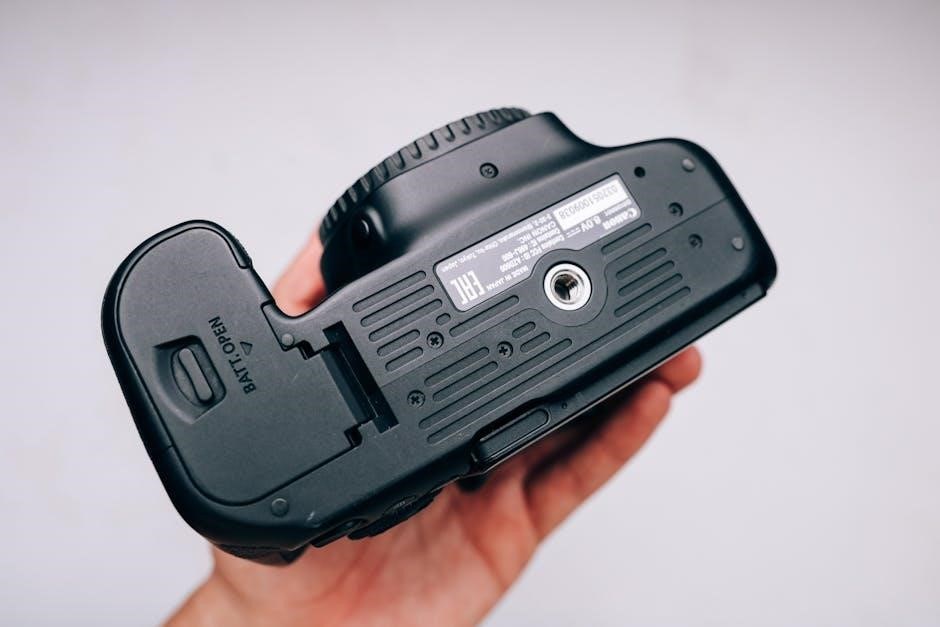
Carefully unpack your Canon MX410 from its box, ensuring all packing materials are removed. Verify that all included components are present: the printer itself, power cord, print head, ink cartridges, setup CD-ROM, and relevant documentation. Inspect the printer for any visible damage that may have occurred during shipping.
Connect the power cord to the printer and a grounded electrical outlet. Do not turn the printer on yet. Next, install the ink cartridges following the instructions detailed in the “Ink Cartridge Installation & Replacement” section. Load plain paper into the paper tray – refer to the “Paper Handling” section for proper loading techniques.
Finally, power on the printer. The initial setup process will guide you through language selection, date/time settings, and connection preferences. Follow the on-screen prompts to complete the setup. Your Canon MX410 is now ready for software installation!
System Requirements & Software Installation
Before installing the software, ensure your computer meets the minimum system requirements. For Windows, this typically includes a Pentium processor, 2GB of RAM, and 2GB of free hard disk space. Mac users require an Intel processor, 2GB of RAM, and similar disk space. Check Canon’s official website for the most up-to-date specifications.
Insert the included CD-ROM or download the latest drivers and software package from Canon’s support website. Run the installer and follow the on-screen instructions. The installation process will guide you through selecting your connection type (USB or Wireless) and configuring printer settings.
During installation, you may be prompted to register your printer; This is recommended for warranty purposes and to receive future updates. Once the installation is complete, test the printer by printing a test page.
Understanding the Control Panel
The Canon MX410 features an intuitive control panel designed for ease of use. It primarily consists of several buttons and a monochrome LCD screen. Familiarizing yourself with these components is crucial for efficient operation. The Power button, located prominently, turns the printer on and off. The Stop button halts current printing or scanning tasks.
Dedicated buttons for Black and Color printing allow for quick selection of print modes. The Scan button initiates the scanning process, while the Copy button starts the copying function. The LCD screen displays printer status, settings, and error messages. Use the directional buttons to navigate through menus and options displayed on the screen.
The OK button confirms selections, and the Cancel button returns to the previous menu.

Button Functions Explained
Each button on the Canon MX410 control panel serves a specific purpose. The Power button initiates system startup and shutdown, indicated by the power light. The Stop button immediately halts any ongoing operation – printing, scanning, or copying – providing a quick interruption method. Black and Color buttons directly select the desired print mode, streamlining single-color or full-color document production.
The Scan button activates the scanning process, preparing the device to capture images or documents. Conversely, the Copy button initiates the copying function, creating physical duplicates of originals. The Start button (often integrated with the color/black buttons) confirms print jobs. The Cancel button allows you to revert to the previous menu or stop a pending operation before it begins.
These buttons, combined with the LCD screen navigation, offer complete control.
LCD Screen Navigation
The Canon MX410’s LCD screen is your central hub for controlling printer functions and accessing settings. Utilize the directional buttons – typically up, down, left, and right – to navigate through the menu options displayed on the screen. Pressing the OK button confirms your selections, allowing you to proceed deeper into menus or initiate actions.
The Menu button grants access to the main settings, encompassing device settings, print options, scan configurations, and maintenance routines. Within menus, use the directional buttons to highlight desired options, and the OK button to select them. The Back or Cancel button typically returns you to the previous screen.
Pay attention to on-screen prompts and icons for clear guidance. The LCD displays status information, such as ink levels and error messages, ensuring informed operation.
Paper Handling
Proper paper handling is crucial for optimal Canon MX410 performance and preventing frustrating jams. This section details supported paper types, correct loading procedures, and troubleshooting for common paper-related issues. The MX410 accommodates a variety of paper, including plain paper, glossy photo paper, envelopes, and specialty media. Always check the paper specifications for weight and size compatibility, detailed in the full manual.
Ensure paper is faned before loading to prevent multiple sheets from feeding simultaneously. Align the paper guides snugly against the stack, but not too tightly, to allow smooth movement. Overfilling the paper tray can also cause issues.

If a paper jam occurs, immediately power off the printer before attempting removal. Gently extract the jammed paper following the illustrated diagrams within the printer and manual, avoiding tearing.
Supported Paper Types & Sizes
The Canon MX410 is designed to handle a diverse range of paper types, ensuring versatility for various printing needs. Plain paper weights between 16-32 lb are readily supported, ideal for everyday documents. For vibrant photo prints, utilize Canon Photo Paper Plus Glossy or similar glossy/matte photo papers; Envelopes (No. 10, Monarch, C5) are also compatible, but ensure proper alignment during loading.
Regarding sizes, the MX410 supports Letter (8.5 x 11 inches), Legal (8.5 x 14 inches), and various custom sizes up to 8.5 x 11 inches. Photo paper sizes typically include 4×6, 5×7, and 8.5×11 inches. Always refer to the detailed paper specifications chart in the complete owner’s manual for precise weight and size limitations to avoid printing errors.
Loading Paper Correctly
Proper paper loading is crucial for optimal Canon MX410 performance. First, extend the paper tray fully. Adjust the paper guides to snugly fit the paper width, without causing bends or creases. Fan the stack of paper to prevent sticking, then load it face down, ensuring the paper edge aligns with the tray’s indicators;
Avoid overfilling the tray; adhere to the maximum paper capacity marked on the tray itself. For envelopes, load them short edge first. Always test print on a few sheets to confirm correct alignment and prevent jams. Incorrect loading can lead to skewed prints or paper feed issues. Regularly check the paper guides for accurate positioning.
Resolving Paper Jams
Paper jams can disrupt printing, but are usually easily resolved. First, power off the Canon MX410. Gently open the access panels – rear tray, inside the printer, and the scanner unit – as indicated in the printer’s display or manual. Carefully remove any visible jammed paper, pulling it in the direction of the normal paper path.
Avoid using excessive force, as this could tear the paper and leave fragments inside. Inspect all areas for remaining pieces. Once clear, close all panels securely. Power the printer back on and attempt a test print. Recurring jams may indicate paper quality issues or incorrect loading; ensure you’re using supported paper types and loading it correctly.
Ink Cartridge Installation & Replacement
Maintaining optimal print quality requires proper ink cartridge management. The Canon MX410 utilizes a straightforward cartridge system for easy replacement. Always power on the printer before attempting installation or removal. Access the cartridge compartment by opening the printer cover. The printer will automatically move the cartridge carriage to the center for access.
Gently remove the old cartridge and install the new one, matching the color codes. Ensure a firm click to confirm secure placement. The printer will then initiate a charging process; avoid interrupting this. Regularly monitor ink levels via the printer’s LCD screen or Canon software to prevent unexpected interruptions during printing. Use only compatible cartridges for best results.

Compatible Ink Cartridges
The Canon MX410 is designed to work optimally with specific ink cartridges to ensure vibrant, high-quality prints and reliable performance. Canon PG-245 Black and Canon CL-246 Color are the standard yield cartridges recommended for everyday printing needs. For increased page yield, consider the Canon PG-245XL Black and Canon CL-246XL Color high-yield options.
Using non-Canon cartridges may lead to diminished print quality, potential printer damage, or voided warranty coverage. Always verify the cartridge number before purchase to guarantee compatibility. Canon also offers value packs containing both black and color cartridges, providing cost savings. Regularly check Canon’s official website for the most up-to-date compatibility information and any newly released cartridge options.

Replacing Ink Cartridges – Step-by-Step
Step 1: Ensure the printer is powered on. Open the printer cover – the print head will move to the center. Step 2: Gently press down on the empty cartridge to release it; then remove it. Step 3: Unpack the new cartridge, removing the orange protective tape. Step 4: Insert the new cartridge into the correct slot (Black on the left, Color on the right) until it clicks into place.
Step 5: Close the printer cover. The printer will automatically align the print head. A maintenance process may initiate. Avoid interrupting this process. Replace cartridges only when prompted by a low ink warning or print quality issues. Proper cartridge replacement ensures optimal printing performance and prevents potential printer malfunctions. Refer to the printer’s LCD screen for guidance.
Ink Level Monitoring
The Canon MX410 offers several ways to monitor ink levels, ensuring you’re never caught mid-print with an empty cartridge. You can check ink levels directly from the printer’s LCD screen. Navigate through the menu using the control panel buttons to find the ‘Ink Levels’ option. Alternatively, you can monitor ink usage from your computer.
For Windows users, open the Canon IJ Printer Assistant Tool. Mac users can utilize Canon IJ Status Monitor. These software applications provide a visual representation of remaining ink for each cartridge. Regularly checking ink levels allows for proactive cartridge replacement, preventing unexpected printing interruptions. The printer may also display low-ink warnings on both the LCD screen and your computer, prompting timely action. Consistent monitoring optimizes print quality and extends cartridge lifespan.
Basic Printing Operations
The Canon MX410 simplifies printing from both computers and mobile devices. To begin, ensure your printer is powered on and connected to your network or computer. Printing from a computer involves selecting the ‘Print’ option within your application, choosing the Canon MX410 as your printer, and adjusting settings like paper size and print quality.
For high-quality photo prints, select ‘Photo Paper’ as the media type and choose a suitable print resolution. The MX410 supports borderless printing for stunning visuals. Remember to load the appropriate paper type for optimal results. The printer automatically adjusts settings based on your selections. Experiment with different settings to achieve your desired print outcome. Always preview your document before printing to avoid wasted paper and ink.
Printing from a Computer (Windows)
To print from a Windows computer with your Canon MX410, open the document or image you wish to print. Select “File” then “Print” from the menu bar. In the print dialog box, choose “Canon MX410 series Printer” from the printer list. Click “Properties” to access advanced settings like paper size, type, and print quality.
Under the “Main” tab, configure basic settings. The “Paper/Quality” tab allows you to select paper type (like plain paper or photo paper) and print quality (draft, standard, high). Ensure the correct paper size is selected to avoid scaling issues. Click “OK” to apply your settings and then click “Print” to start the printing process. Regularly updating your printer driver ensures optimal performance and compatibility.
Printing from a Computer (Mac)
Initiating a print job from your Mac to the Canon MX410 is straightforward. Open the desired document or image. Navigate to “File” and select “Print” from the menu. In the print dialog, locate and choose “Canon MX410 series Printer” from the list of available printers. Click the “Show Details” button if the advanced options aren’t visible.
Within the detailed settings, you can adjust parameters like paper size, paper type, and print quality. The dropdown menus allow for precise control over these aspects. Ensure the selected paper size matches the loaded paper. For optimal results, keep your printer driver updated through Canon’s website. Click “Print” to begin the printing process, and enjoy high-quality output.

Printing Photos
The Canon MX410 excels at producing vibrant and detailed photographs. To print photos, open the image file on your computer. Select “File” then “Print.” Choose “Canon MX410 series Printer” from the printer selection menu. Access detailed settings for optimal photo printing. Select the appropriate paper type – glossy or matte – within the driver settings.
For best results, choose “High” print quality. Utilize the “Color Matching” options to ensure accurate color reproduction. Consider enabling borderless printing for a professional look. Experiment with different paper types to achieve your desired aesthetic. Regularly clean the print heads for consistent photo quality. Remember to use genuine Canon ink for lasting, fade-resistant prints.
Scanning & Copying
The Canon MX410 offers versatile scanning and copying functionalities. To scan a document, place it face down on the scanner glass. Utilize the Canon PRINT app or the computer software to initiate the scan. Select your desired resolution and file format – PDF, JPEG, or TIFF. Preview the scan before saving to ensure accuracy. For copying, simply place the original document on the scanner glass and press the copy button on the control panel.
Adjust copy settings like darkness and number of copies as needed. The MX410 supports both standard and multiple-copy functions. Explore options for two-sided copying to conserve paper. Regularly clean the scanner glass for optimal scan quality. Remember to select the appropriate document type for best results.
Scanning Documents to a Computer
Scanning documents to your computer with the Canon MX410 is straightforward. First, ensure the printer is connected to your computer, either via USB or Wi-Fi; Place the document face down on the scanner glass. Open the Canon IJ Scan Utility software on your computer – this is installed during the initial software setup. Within the software, select your desired scan settings, including document type, resolution (DPI), color mode, and file format (PDF, JPEG, etc.).
Preview the scan to confirm it meets your needs. You can adjust settings if necessary. Finally, click the “Scan” button and choose a destination folder on your computer to save the scanned document. Alternatively, utilize the Canon PRINT app for mobile scanning directly to your computer or cloud storage.
Making Copies – Standard & Multiple
The Canon MX410 offers both standard single-copy and multiple-copy functionality. To make a standard copy, place your original document face down on the scanner glass. Press the “Copy” button on the control panel. The printer will automatically scan and print a single copy. For multiple copies, after pressing “Copy,” use the numeric keypad to enter the desired number of copies. Then, press the “Start” button (the black triangle).
The MX410 will automatically collate the copies for you. You can also adjust copy settings like darkness and paper size before initiating the copy process using the control panel’s buttons. Ensure sufficient paper is loaded in the paper tray before starting a multi-copy job to avoid interruptions.
Wireless Setup & Connectivity
The Canon MX410 offers versatile wireless connectivity options, enhancing convenience and flexibility. To connect to a Wi-Fi network, access the printer’s setup menu via the LCD screen. Navigate to the wireless settings and select your network from the available list. Enter your Wi-Fi password when prompted, ensuring correct capitalization. Once connected, the printer will display a confirmation message.
For simplified setup and control, utilize the Canon PRINT app, available for both iOS and Android devices. The app guides you through the wireless setup process and allows for remote printing and scanning. It also provides access to printer settings and status information. Enjoy seamless printing from smartphones, tablets, and laptops without the need for cables.
Connecting to a Wi-Fi Network
Establishing a Wi-Fi connection for your Canon MX410 unlocks convenient wireless printing and scanning. Begin by ensuring your wireless router is active and broadcasting a signal. On the printer’s LCD panel, navigate to the setup menu, typically represented by a gear icon. Select “Wireless LAN Setup” and then “Setup a New Connection.”
The printer will scan for available networks. Choose your network from the displayed list. If your network is hidden, manually enter the SSID (network name). You’ll then be prompted to enter your WPA key or password. Double-check for accuracy, as incorrect credentials will prevent connection. Upon successful connection, a confirmation message will appear on the LCD screen, indicating a stable wireless link.
Using Canon PRINT App
The Canon PRINT app significantly enhances your MX410 experience, offering mobile printing and scanning capabilities. Download the app from the App Store (iOS) or Google Play Store (Android) and install it on your smartphone or tablet. Ensure your printer and mobile device are connected to the same Wi-Fi network.
Launch the Canon PRINT app and follow the on-screen instructions to add your MX410 printer. The app will automatically detect compatible printers on your network. Once added, you can easily print documents and photos directly from your device, scan documents to your phone’s storage, and monitor ink levels. Explore the app’s features for advanced options like cloud printing and template customization, streamlining your printing tasks from anywhere.
Troubleshooting Common Issues
Encountering issues with your Canon MX410? This section addresses frequent problems. If the printer isn’t responding, verify the power cord connection, ensure it’s turned on, and check for any error messages on the LCD screen. Confirm the printer is selected as the default printer on your computer. For print quality problems, examine the ink levels and replace cartridges if low. Run a print head alignment from the printer’s maintenance menu.
Paper jams require carefully removing the jammed paper, following the instructions in the ‘Resolving Paper Jams’ section. If wireless connectivity fails, restart both the printer and your router. Consult Canon’s support website for detailed troubleshooting guides and frequently asked questions. Regularly updating the printer’s firmware can also resolve many issues.

Printer Not Responding
If your Canon MX410 isn’t responding, begin with the basics. First, verify the power cord is securely connected to both the printer and a working electrical outlet. Ensure the printer’s power button is illuminated, indicating it’s turned on. Next, check the LCD screen for any error messages; these provide valuable clues about the problem. Confirm the printer is selected as the default printer on your computer’s settings.

Try restarting both your computer and the printer. If connected via USB, try a different USB port or cable. For network connections, ensure the printer is connected to the same network as your computer. A simple reset can often resolve communication issues. Consult Canon’s online support resources for more advanced troubleshooting steps.
Print Quality Problems
Experiencing poor print quality with your Canon MX410? Several factors could be at play. Begin by checking your ink levels; low ink is a common culprit. Run a print head cleaning cycle through the printer’s maintenance settings – this can clear clogged nozzles. Ensure you’re using compatible Canon ink cartridges and that they are properly installed. The type of paper also significantly impacts print quality; use paper recommended for your printing needs.
Adjust the print quality settings in your printer driver. Experiment with different settings like ‘Standard,’ ‘High,’ or ‘Draft’ to find the optimal balance. If streaks or smudges persist, run a print head alignment procedure. Regularly cleaning the printer and using quality materials will maintain optimal print results.
Maintenance & Cleaning
Regular maintenance ensures your Canon MX410 operates efficiently and delivers consistent print quality. Periodically clean the exterior of the printer with a soft, damp cloth. Avoid using harsh chemicals or abrasive cleaners. Run the print head cleaning utility from the printer’s maintenance menu at least monthly, or more frequently if you notice print quality issues.
Inspect the paper path for any obstructions or debris. Gently remove any visible paper fragments. It’s also crucial to periodically clean the scanner glass with a lint-free cloth and scanner cleaning solution. Proper cleaning extends the lifespan of your MX410 and prevents potential malfunctions. Refer to the detailed cleaning instructions within the printer’s software for optimal results.
Canon MX410 Specifications
The Canon MX410 is a versatile All-in-One printer offering print, scan, copy, and fax functionalities. It boasts a maximum print resolution of 4800 x 1200 dpi for detailed prints. Print speeds reach up to 8.8 images per minute (ipm) for black and white, and 5.0 ipm for color documents. The printer supports automatic duplex printing, saving paper.
It features a color LCD screen for easy navigation and operation. Connectivity options include Hi-Speed USB and Wi-Fi. Supported paper sizes range from A4 to Letter, with various media types. The MX410 utilizes Canon’s FINE print head technology for exceptional image quality. Its dimensions are approximately 17.3″ x 11.7″ x 6.7″, and it weighs around 12.1 lbs.